How to Verify Your Email Address as an Email Sender
Follow these step-by-step instructions to verify your email address, ensuring you can start sending email campaigns and automations effectively.
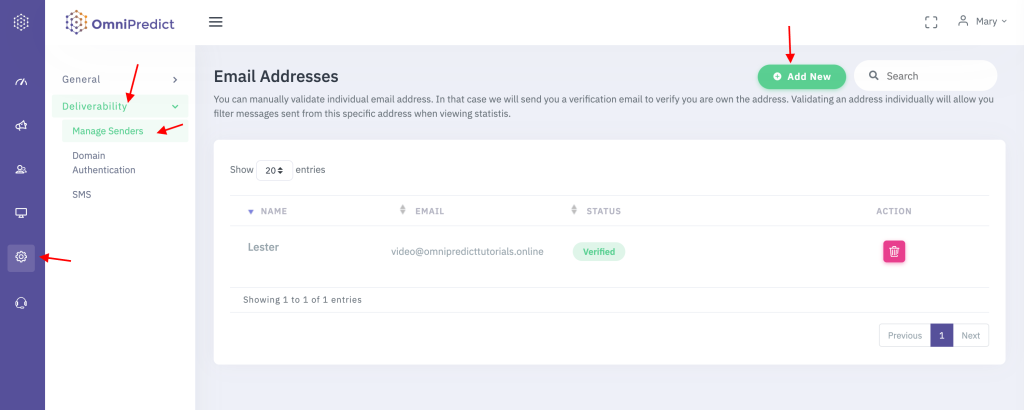
Step 1: Access Settings
- Navigate to the ‘Settings’ tab in your Omnipredict dashboard.
Step 2: Go to Deliverability
- Within the Settings menu, select ‘Deliverability’ to manage your email sending capabilities.
Step 3: Manage Senders
- Click on ‘Manage Senders’ to view and manage your list of email sender addresses.
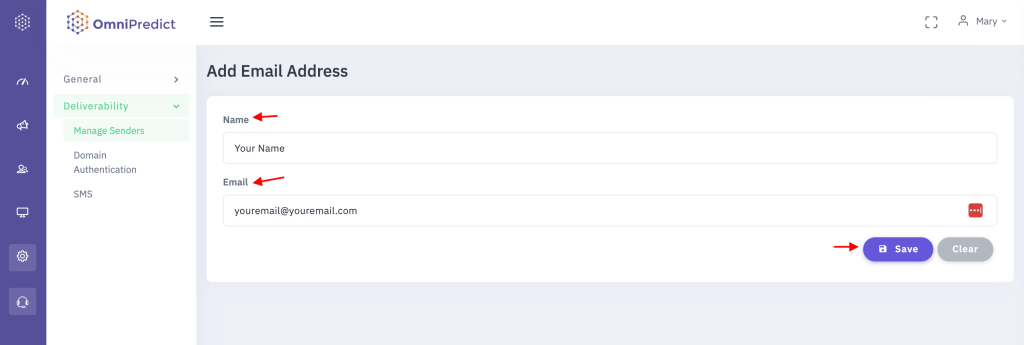
Step 4 Add a New Email Address
- Click on ‘Add New’ to include a new email sender to your list.
- Enter your name in the provided field as it will appear to your customers (e.g., Chris Omnipredict).
- Input your email address that you wish to verify.
Step 5: Save and Send Verification
- Click ‘Save’ to register your new sender. This action will trigger a verification email to the address you provided.
Step 6: Verify Your Email Address
- Open your email inbox and refresh to find the verification email.
- Click on ‘Verify Now’ within the email to confirm your email address.
Step 7: Confirm Verification Status
- Return to the ‘Manage Senders’ page and refresh it to update the status.
- Check that your email address is now listed as ‘Verified’. This status is crucial for initiating email campaigns and automations.
Additional Information:
- Ensure you have a verified email setup before you can start sending out campaigns.
- If you encounter any issues or have questions, please contact our friendly support team for assistance.