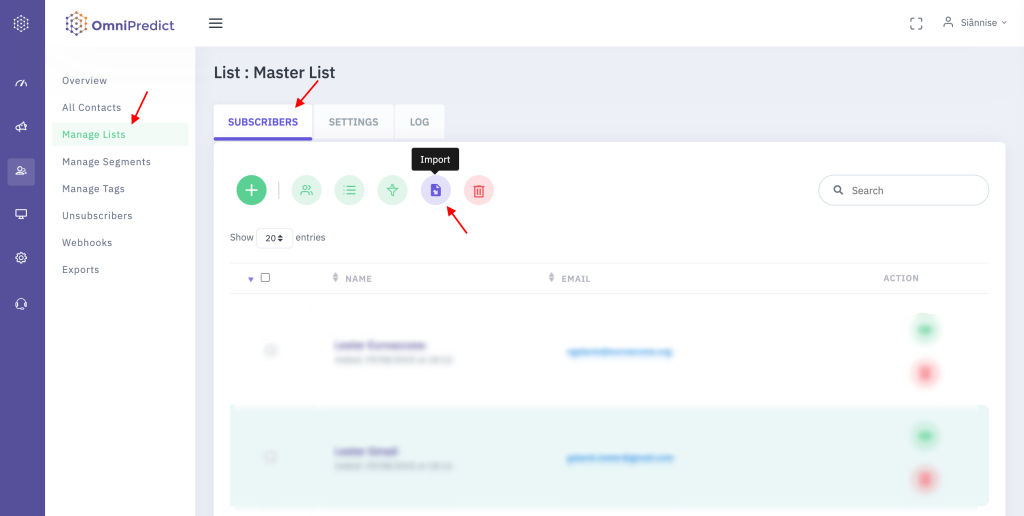
When editing a list, click on the subscribers’ tab and import.
In the next step, make sure you read the instructions and understand if you have consent to send emails to these users.
Select the list you want to upload the CSV and click on upload contacts.
In the next step, you will see the importer wizard. You can upload your file at this step. Files accepted are .csv, .tsv, .xls, .xlsx, .xml.
After uploading your CSV file, you will follow some steps for successful entry.
In the first step, select if your file has headers to match fields and encoding.
In the next step, you need to match file columns with the fields in the system. The platform provides some default fields, and you can add custom also. Don’t worry if you didn’t create all the custom fields before you started the import. The importer allows you to even during the process to do so.
You can map and confirm mapping, create a new field or ignore a column during import.

The next step is the final review before you import your list. The importer will give the option to see records with problems (if any), like missing details.
If you don’t have any rows with a problem, you can click and import the contacts. Depending on the size of the list can take from seconds to a few minutes. You will get an email notification when the process is complete.
If you have rows with a problem, you can click to see the issue and decide if you want to ignore these rows and proceed with importing.
TIP: You can download a CSV file of the rows with issues to work on a separate file, and you can continue with importing. You can always come back and upload the rest.
Go to Contacts -> Manage lists. You can select an existing list or create a new one.

When editing a list, click on the subscribers tab and import.

In the next step, make sure you read the instructions and understand if you have consent to send emails to these users.

Select the list you want to upload the CSV and click on upload contacts.

In the next step, you will see the importer wizard. You can upload your file at this step. Files accepted are .csv, .tsv, .xls, .xlsx, .xml.

After uploading your CSV file, you will follow some steps for successful entry.
In the first step, select if your file has headers to match fields and encoding.

In the next step, you need to match file columns with the fields in the system. The platform provides some default fields, and you can add custom also. Don’t worry if you didn’t create all the custom fields before you started the import. The importer allows you to even during the process to do so.
You can map and confirm mapping, create a new field or ignore a column during import.
The next step is the final review before you import your list. The importer will give the option to see records with problems (if any), like missing details.
If you don’t have any rows with a problem, you can click and import the contacts. Depending on the size of the list can take from seconds to a few minutes. You will get an email notification when the process is complete.
If you have rows with a problem, you can click to see the issue and decide if you want to ignore these rows and proceed with importing.
TIP: You can download a CSV file of the rows with issues to work on a separate file, and you can continue with importing. You can always come back and upload the rest.
Go to Contacts -> Manage lists. You can select an existing list or create a new one.
When editing a list, click on the subscribers tab and import.
In the next step, make sure you read the instructions and understand if you have consent to send emails to these users.
Select the list you want to upload the CSV and click on upload contacts.
In the next step, you will see the importer wizard. You can upload your file at this step. Files accepted are .csv, .tsv, .xls, .xlsx, .xml.
After uploading your CSV file, you will follow some steps for successful entry.
In the first step, select if your file has headers to match fields and encoding.
In the next step, you need to match file columns with the fields in the system. The platform provides some default fields, and you can add custom also. Don’t worry if you didn’t create all the custom fields before you started the import. The importer allows you to even during the process to do so.
You can map and confirm mapping, create a new field or ignore a column during import.
The next step is the final review before you import your list. The importer will give the option to see records with problems (if any), like missing details.
If you don’t have any rows with a problem, you can click and import the contacts. Depending on the size of the list can take from seconds to a few minutes. You will get an email notification when the process is complete.
If you have rows with a problem, you can click to see the issue and decide if you want to ignore these rows and proceed with importing.
TIP: You can download a CSV file of the rows with issues to work on a separate file, and you can continue with importing. You can always come back and upload the rest.